💳 Setting up Stripe as a payment provider
Stripe is an online payment service that lets you securely accept card payments. In our platform, Stripe is used for two features:
- Online payments — paid registration for an event
- Security deposit — a blocked deposit, returned after the event
If either of these features is enabled on an event, a connected Stripe account is mandatory.
Stripe is free to sign up — fees are only charged per transaction (no setup fees, no monthly fees). See Stripe's pricing page for details.
Objective
By the end of this guide, you will have:
- created a Stripe account (or retrieved your keys from an existing one);
- added Stripe as a payment provider in your organisation;
- linked that provider to your event so that paid registrations and deposits work correctly.
Expected result
At the end of the setup:
- a Live Stripe provider appears under Payment Providers in your organisation;
- the provider is selected in the payment settings of your event;
- your event can accept online payments and/or security deposits through Stripe.
Before you start
- Make sure you have an administrator role on your organisation in the backoffice.
- Have your Stripe account ready, or create one at dashboard.stripe.com/register.
Step-by-step configuration
1. Retrieve your Stripe API keys
In your Stripe dashboard, go to Developers → API keys.
Copy the two Live keys:
- Publishable key — starts with
pk_live_ - Secret key — starts with
sk_live_(if it does not exist yet, click Create secret key to generate one)
Use the Live keys, not the Test keys. Test keys (
pk_test_/sk_test_) only work in test mode and will not process real payments.
2. Add the provider in the backoffice
- Go to Organisations and select your organisation.
- In the left menu, click Payment Providers.
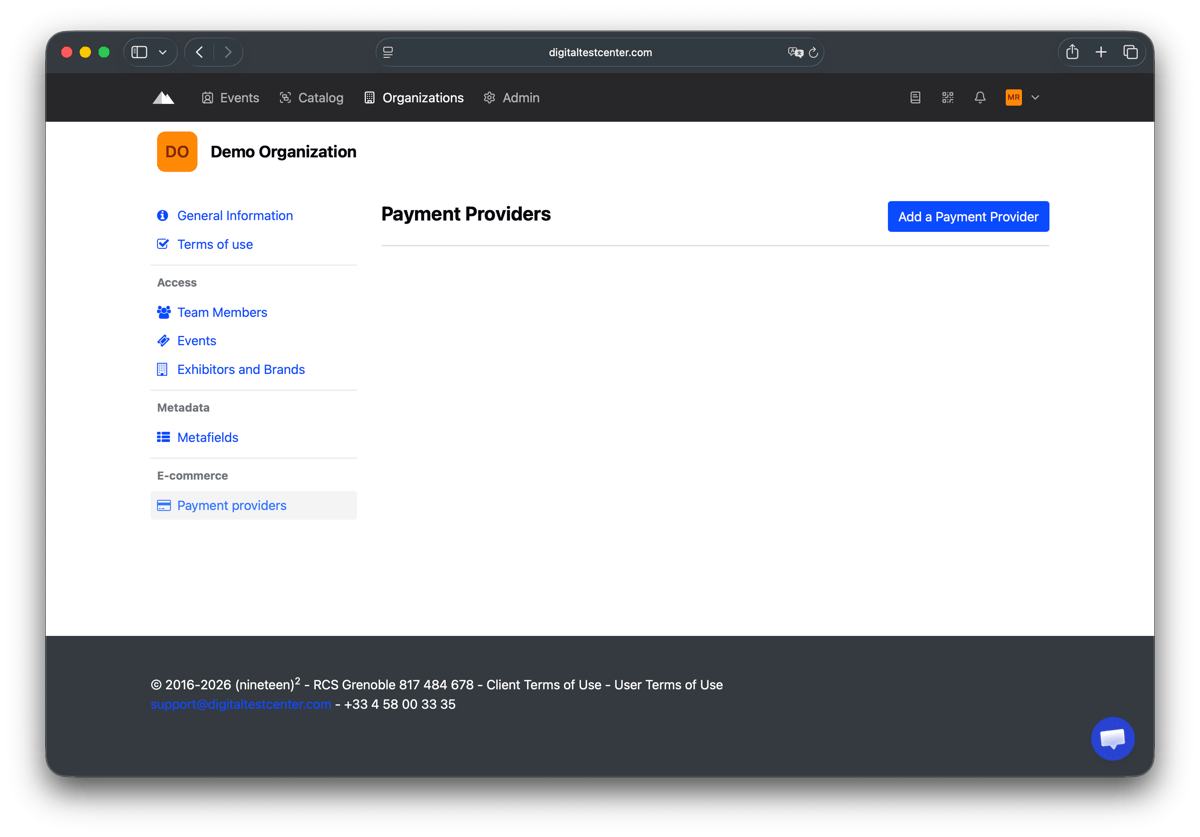
- Click Add a Payment Provider.
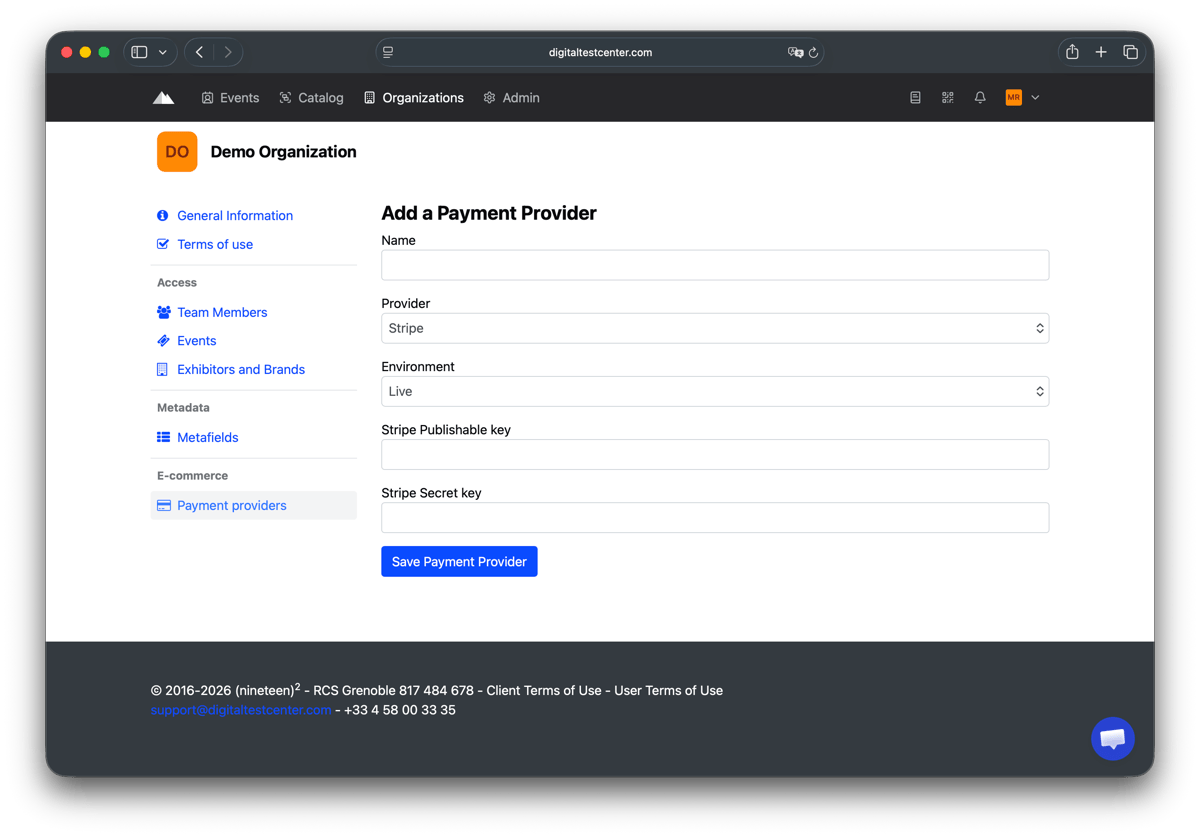
- Fill in the form:
- Name: a label of your choice (e.g.
Stripe Live) - Provider: Stripe
- Environment: Live
- Stripe Publishable key: paste your public key
- Stripe Secret key: paste your secret key
- Name: a label of your choice (e.g.
- Click Save Payment Provider.
3. Link the provider to an event
- Open the advanced settings of the relevant event.
- Go to the Payment settings section.
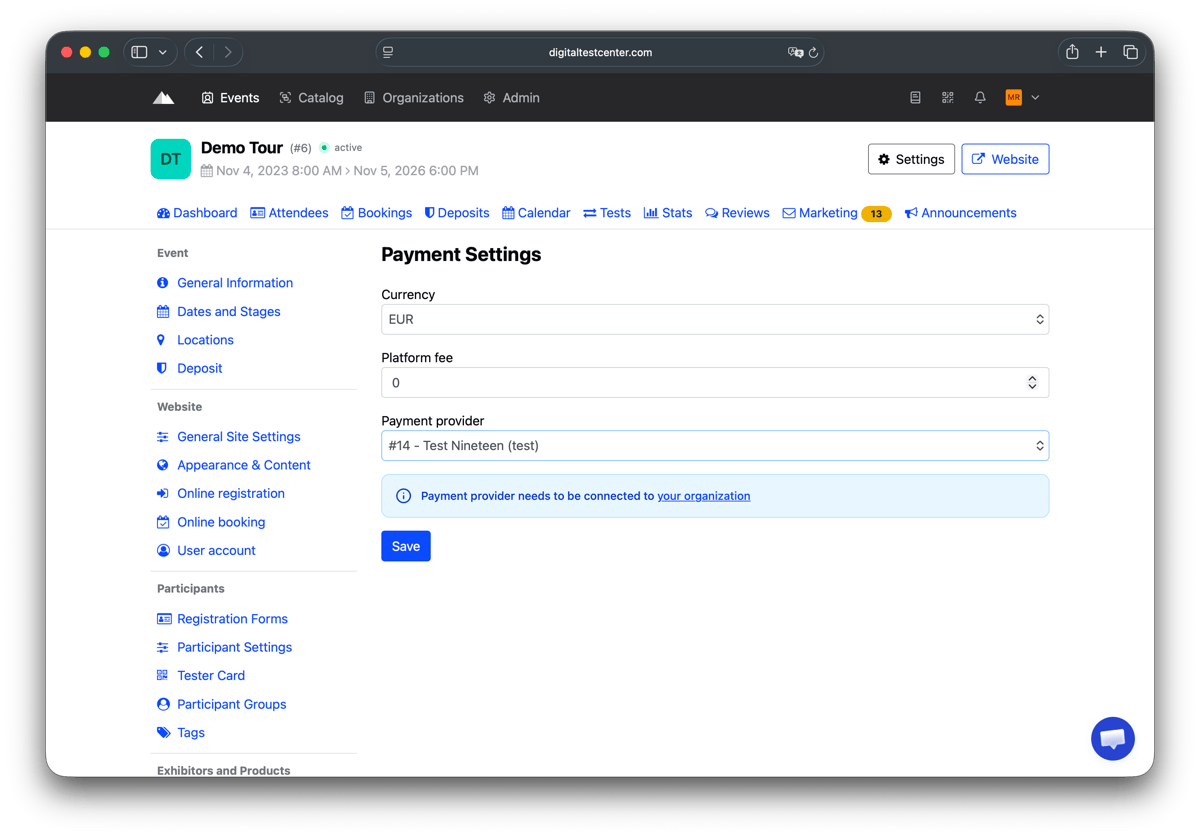
- Select the Stripe provider you created from the Payment provider dropdown.
- Click Save.
If no provider appears in the list, check that the provider is correctly configured at the organisation level (see step 2 above).
How to verify the result
After saving the event settings, confirm that the Stripe provider is selected in the event's payment settings. The event can now process online payments and security deposits through Stripe — transactions will appear in your Stripe dashboard under Payments.