👁️ How to make items visible on Live
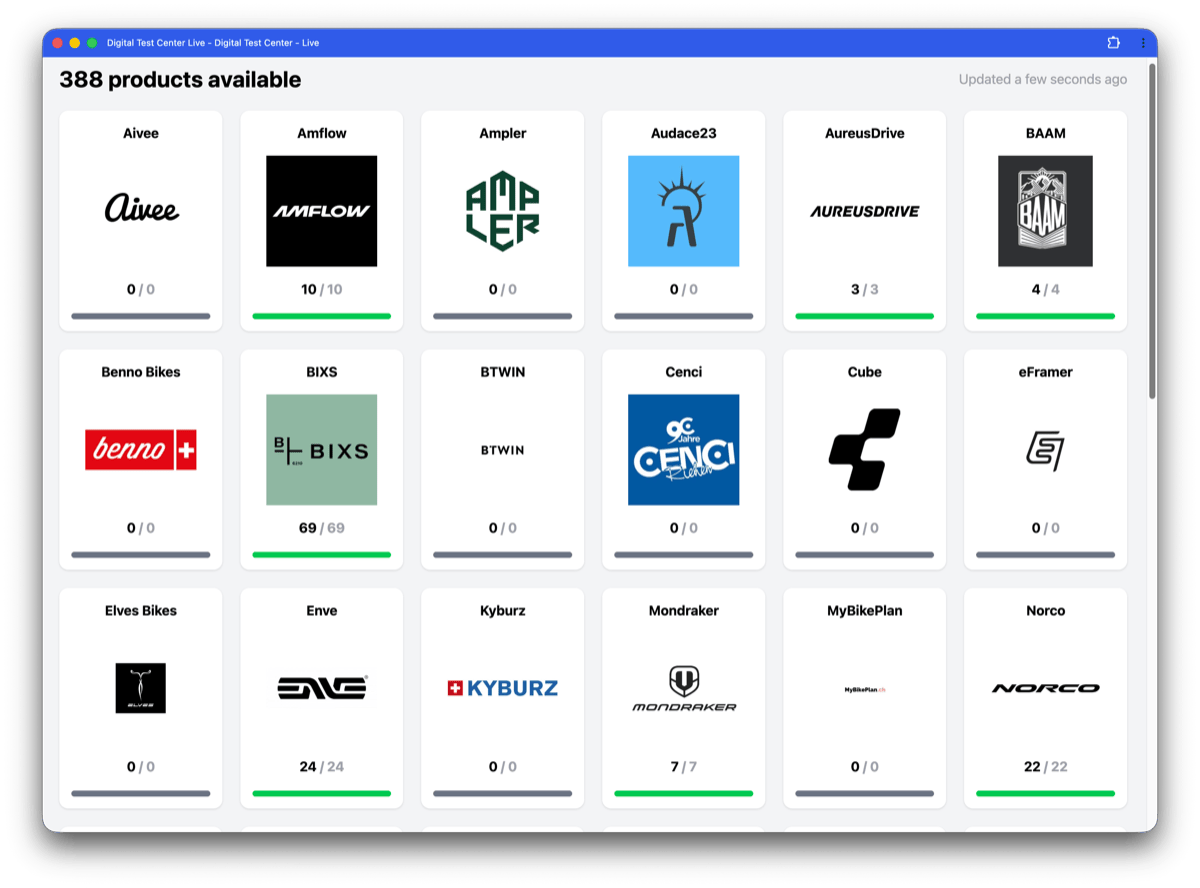
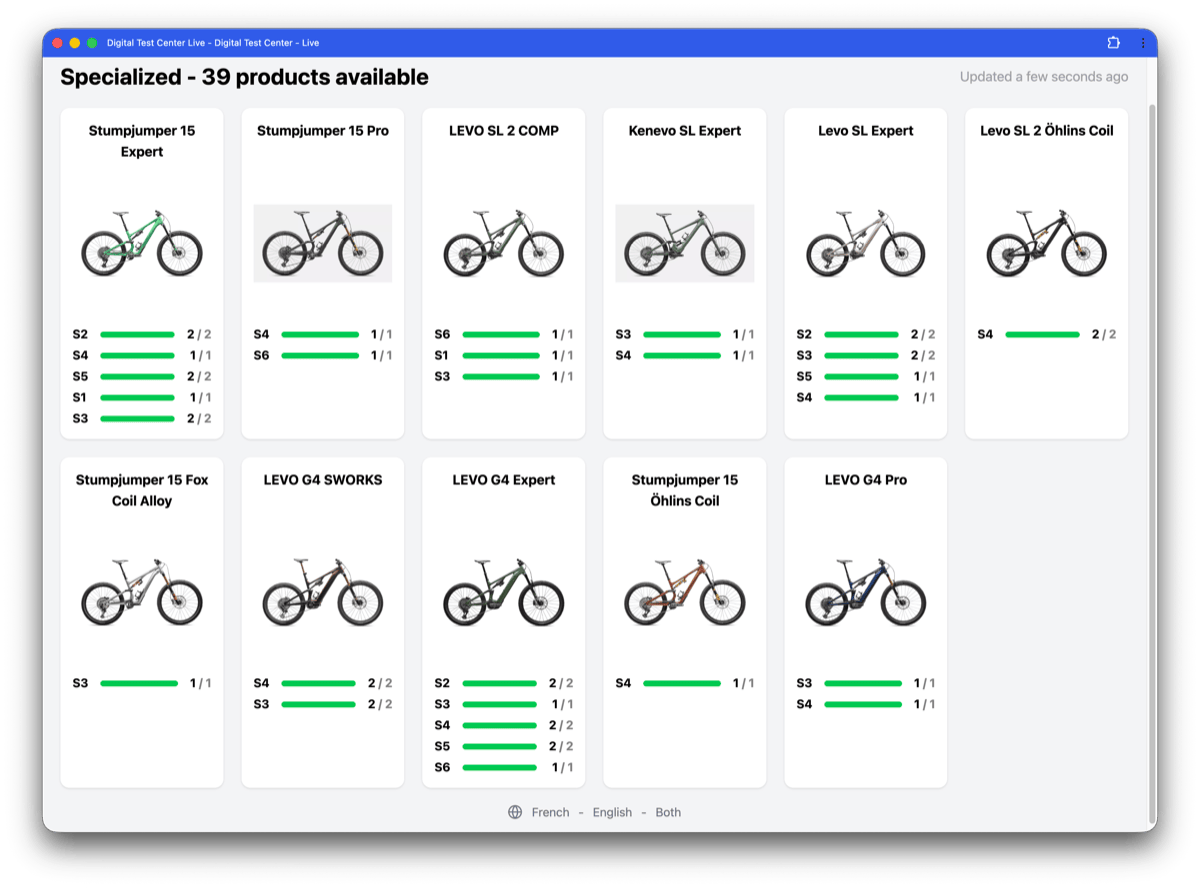
The Product live availability interface allows event testers to view the real-time availability of products.
It is made of two screens:
- a listing screen that displays all brands available for the event;
- a brand detail screen that displays the available products for each brand.
Objective
By the end of this practical guide, you will know how to configure your items so they appear in the Product live availability interface.
Expected result
At the end of the setup:
- the relevant brands appear in the Live listing screen;
- each brand shows the expected products in its detail screen;
- testers can view the real-time availability of the expected products.
Before you start
Before following this guide, make sure you have administrator rights on the relevant exhibitor.
Step-by-step configuration
The setup is done in three main steps.
1. Make sure the brand is public
To appear in the Product live availability interface, the brand must be set as public.
From the brand page, open the Settings tab, check display to public, then click save.
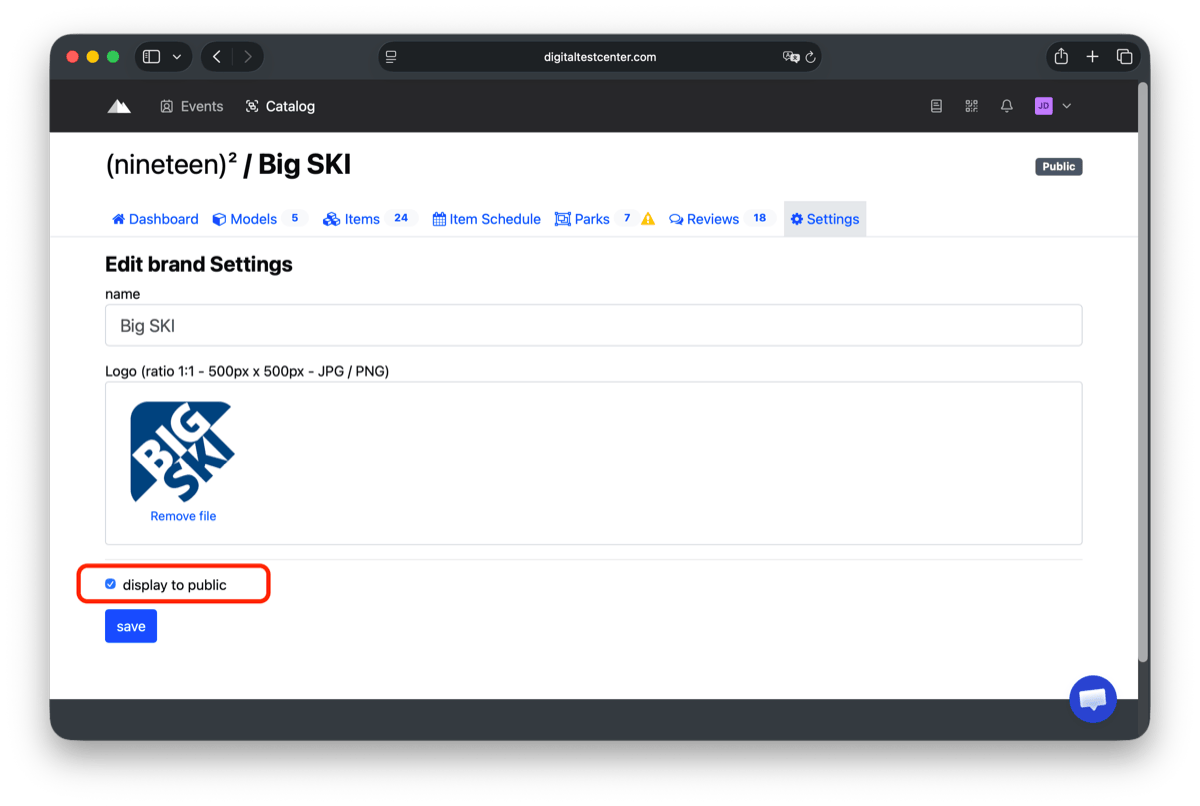
You can then confirm that the brand is public from the brand list by checking the Public badge.

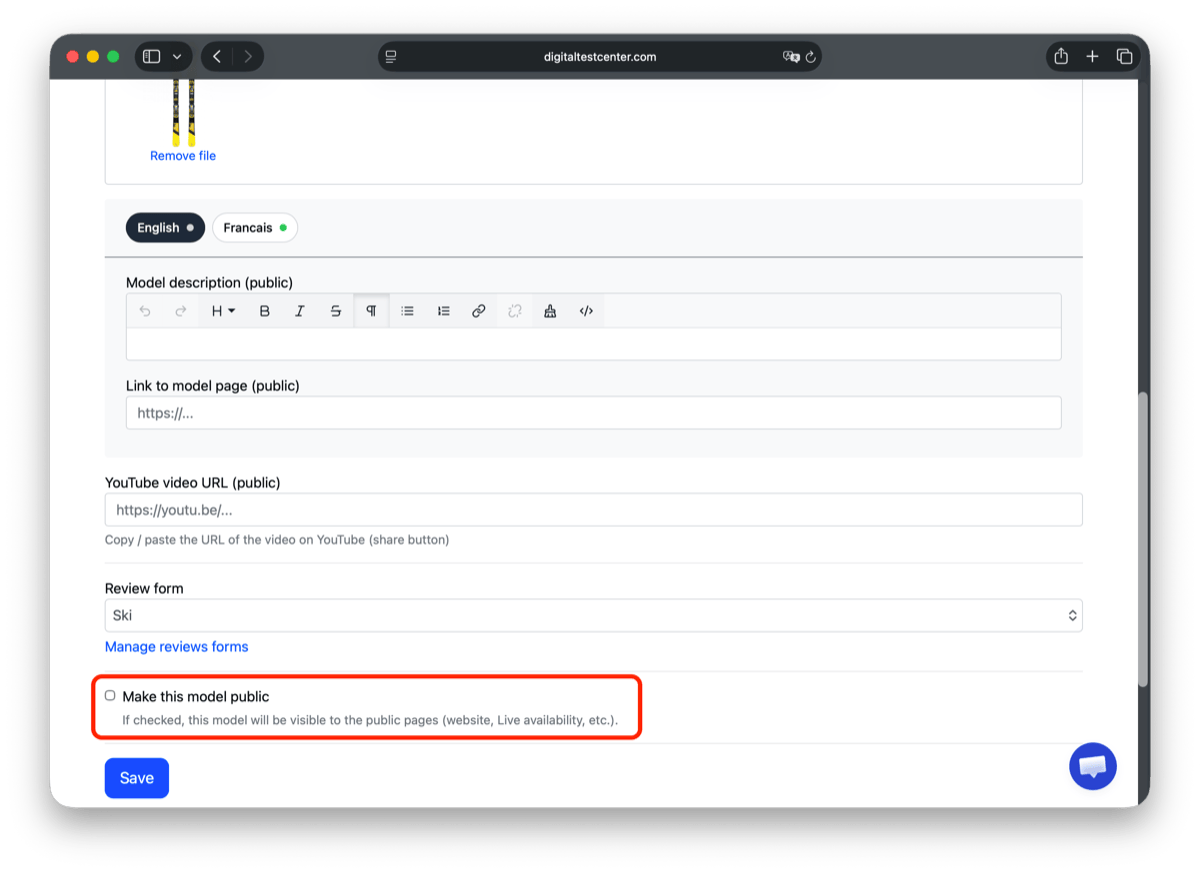
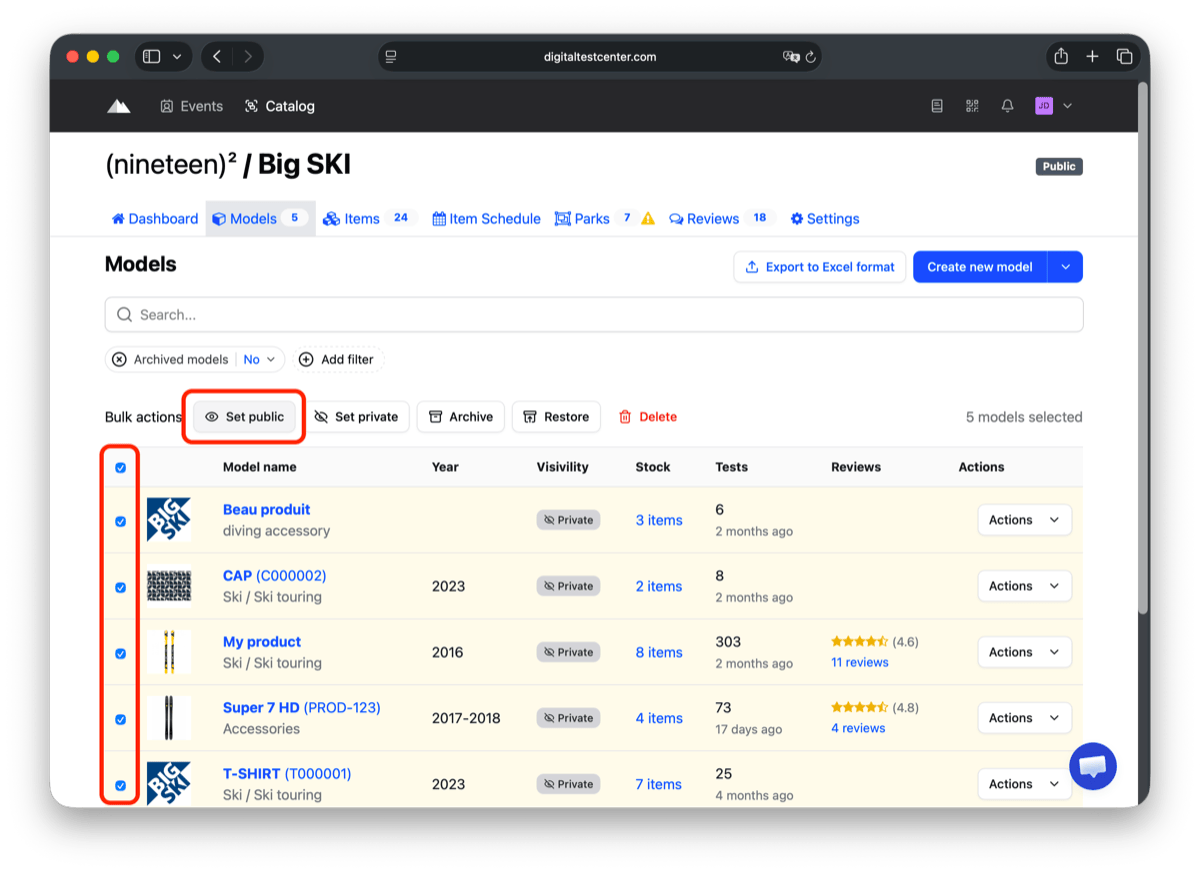
2. Make sure the model is public
The model must also be set as public to appear in the Product live availability interface.
There are two ways to do this:
- from the model details page, by checking Make this model public, then saving;
- from the model list, by selecting one or several models and using the Set public bulk action.
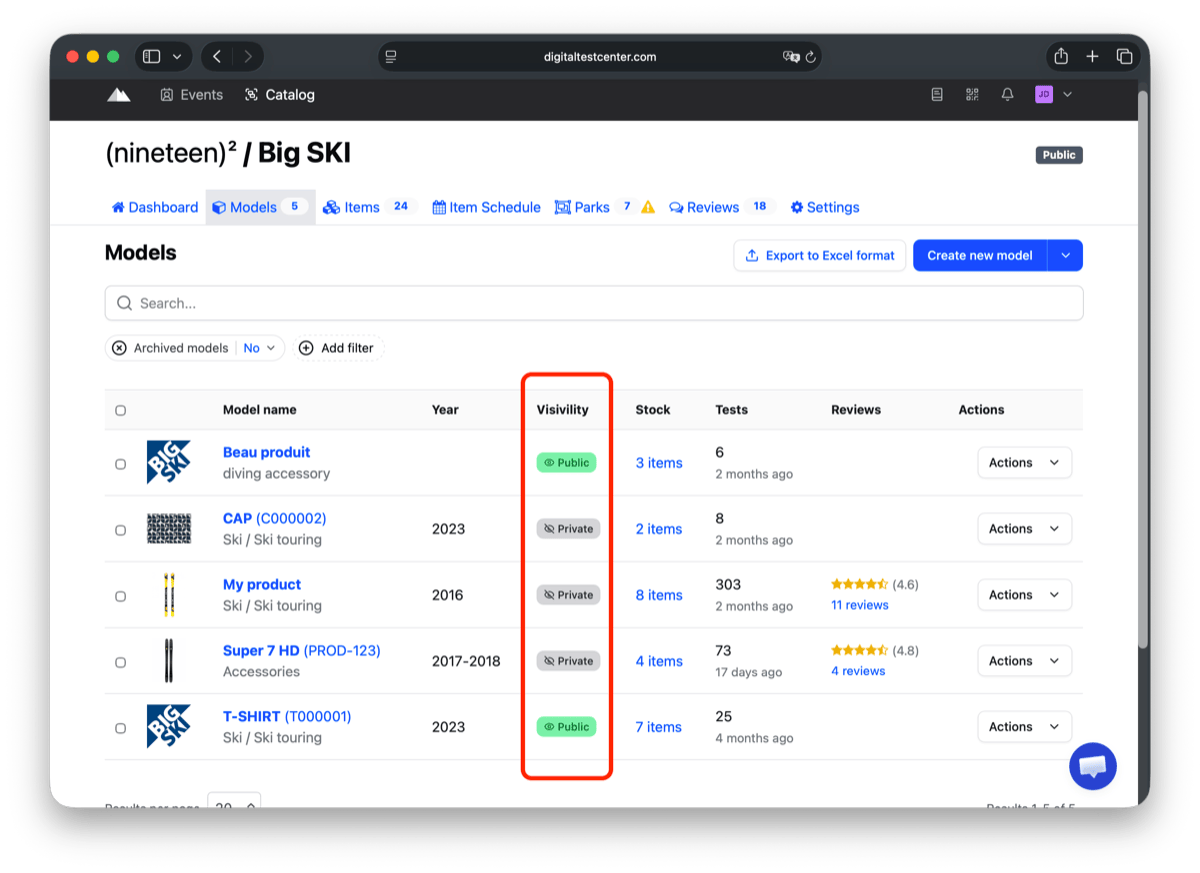
Once the update is done, check the Visibility column to make sure the model is marked Public.
3. Make sure items are in a park selected for the event
Prerequisite
Before you can make items visible on Live and add them to a park, you must first create them in the catalog.
See the Item management page to learn how to create the items corresponding to your physical products.
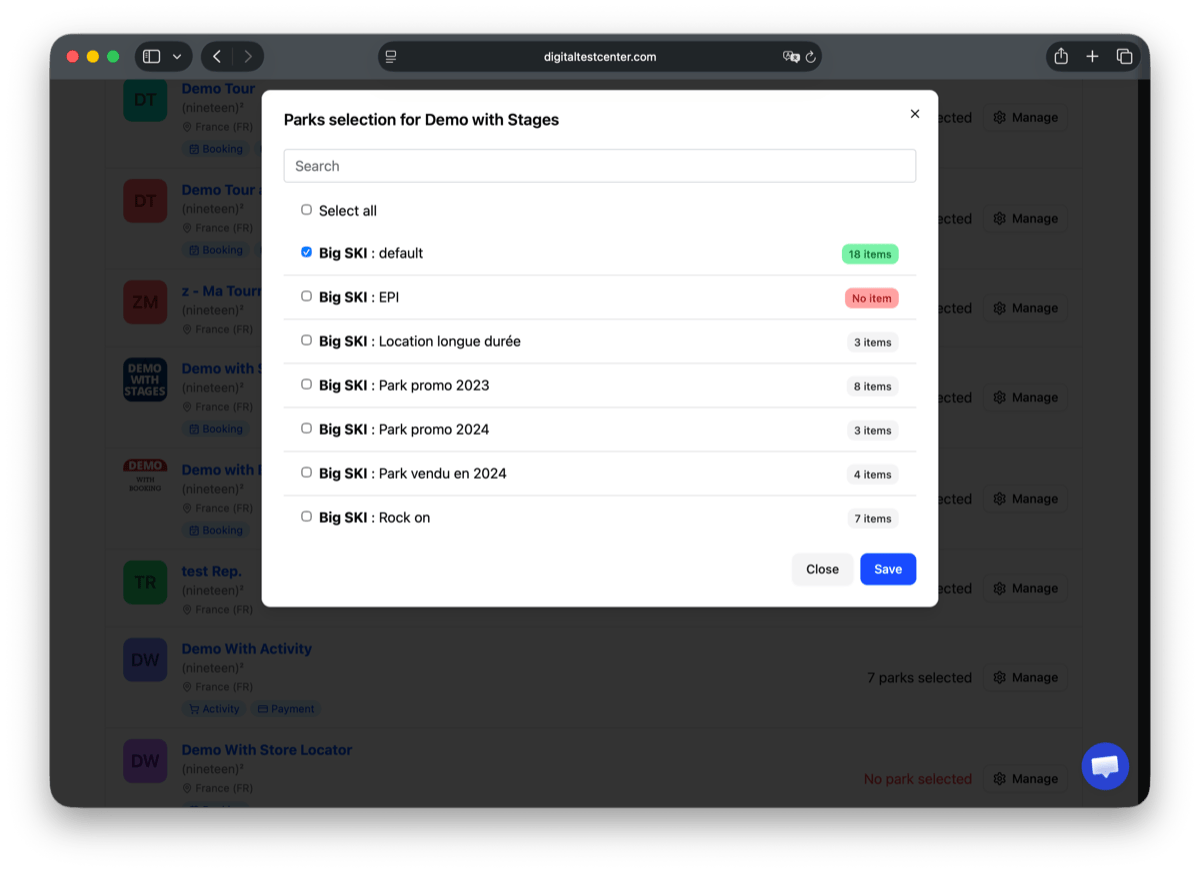
For an item to appear in Product live availability, it must belong to a park that is selected for the target event.
From the Parks tab, you can review the list of existing parks and, in the events section, check how many parks are currently selected for each event.
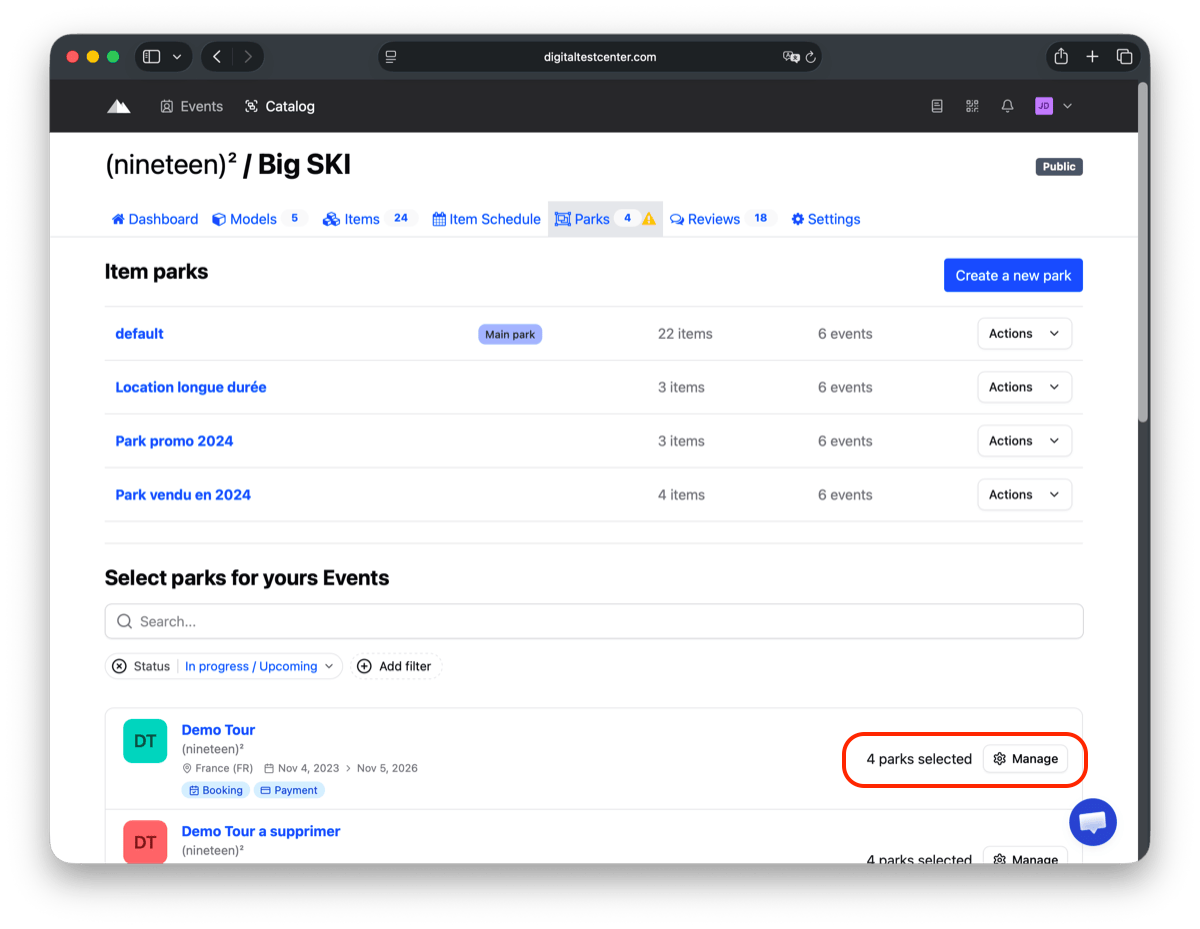
Click Manage for the relevant event, then select the park or parks that contain the items you want to display. Finish by clicking Save.
How to verify the result
Open the Product live availability interface for the event and confirm that the expected brands and products are displayed.
The verification URL is specific to each event. To check the result, first make sure you have the correct event URL from the organizer.