🧩 Model Management
Model Management Interface
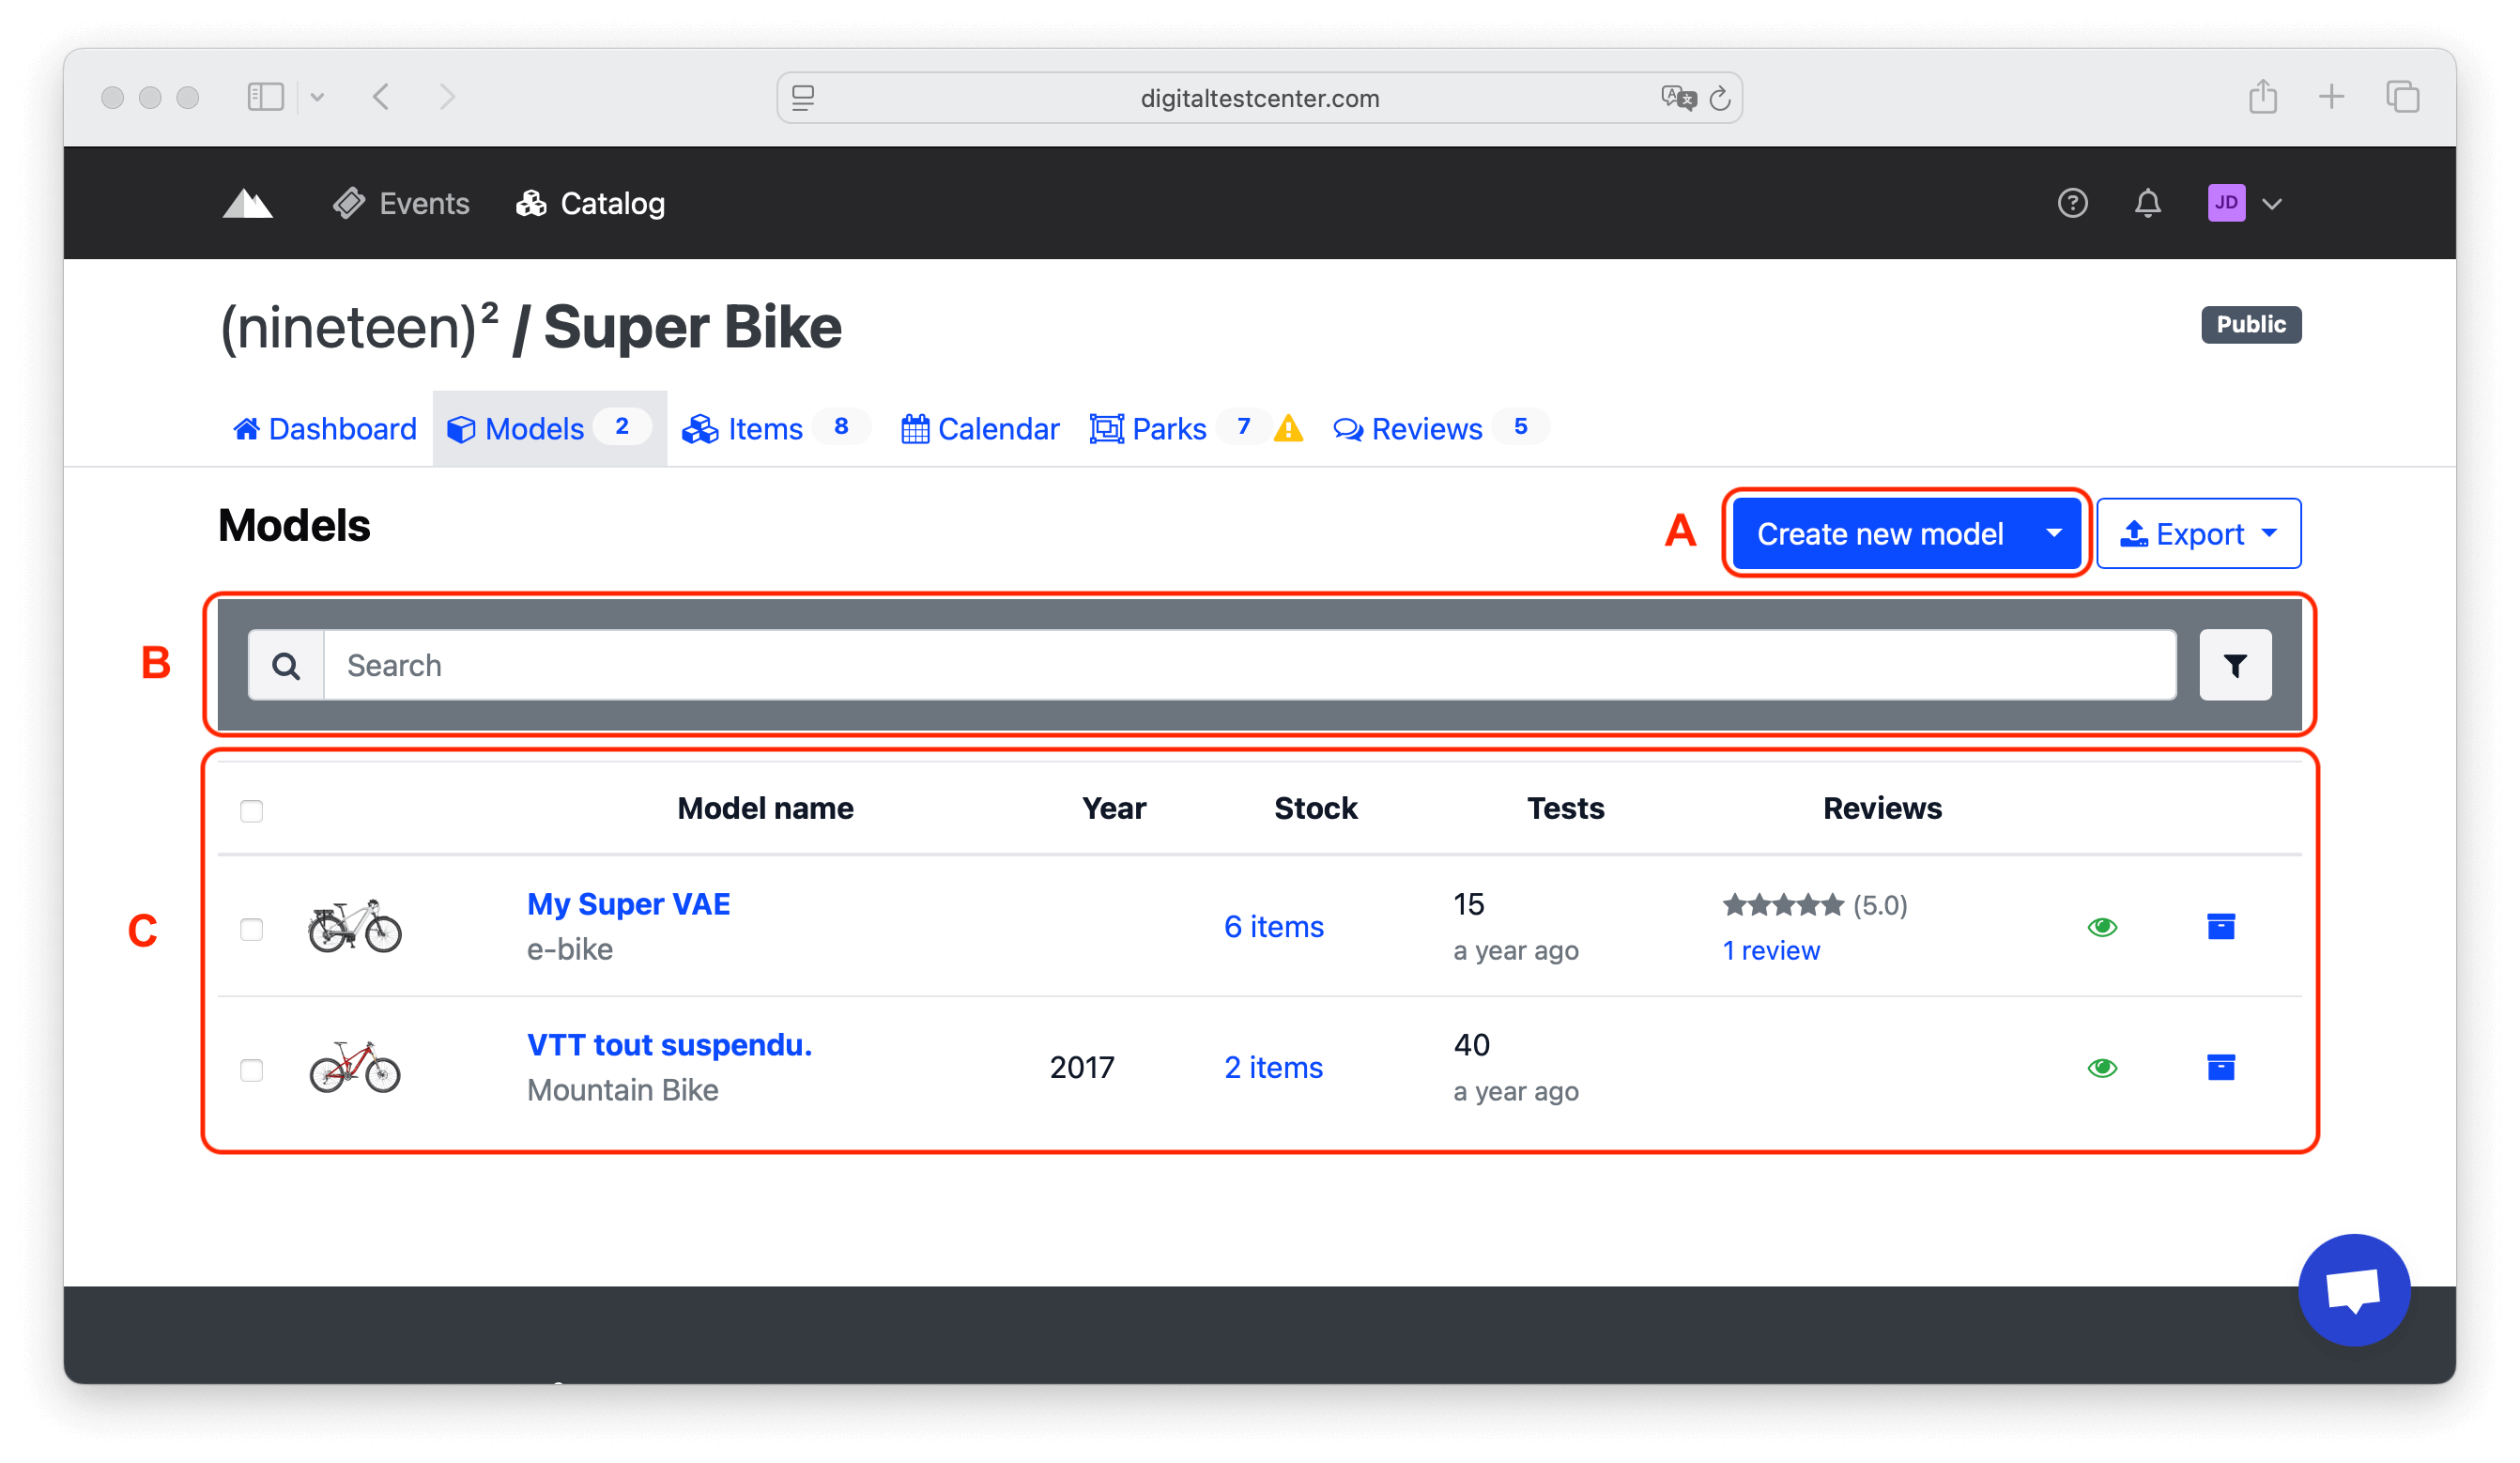
A: Click on Create new model to add a new model.
B: Search your existing models.
C: View the models list.

Explanation:
- A: Bulk actions (Archiving, Visibility)
- B: Edit model details
- C: Associated items
- D: Number of tests
- E: Ratings and comments on the model (paid option)
- F: Model visibility (public/private)
- G: Archive the model (no longer display / remove items)
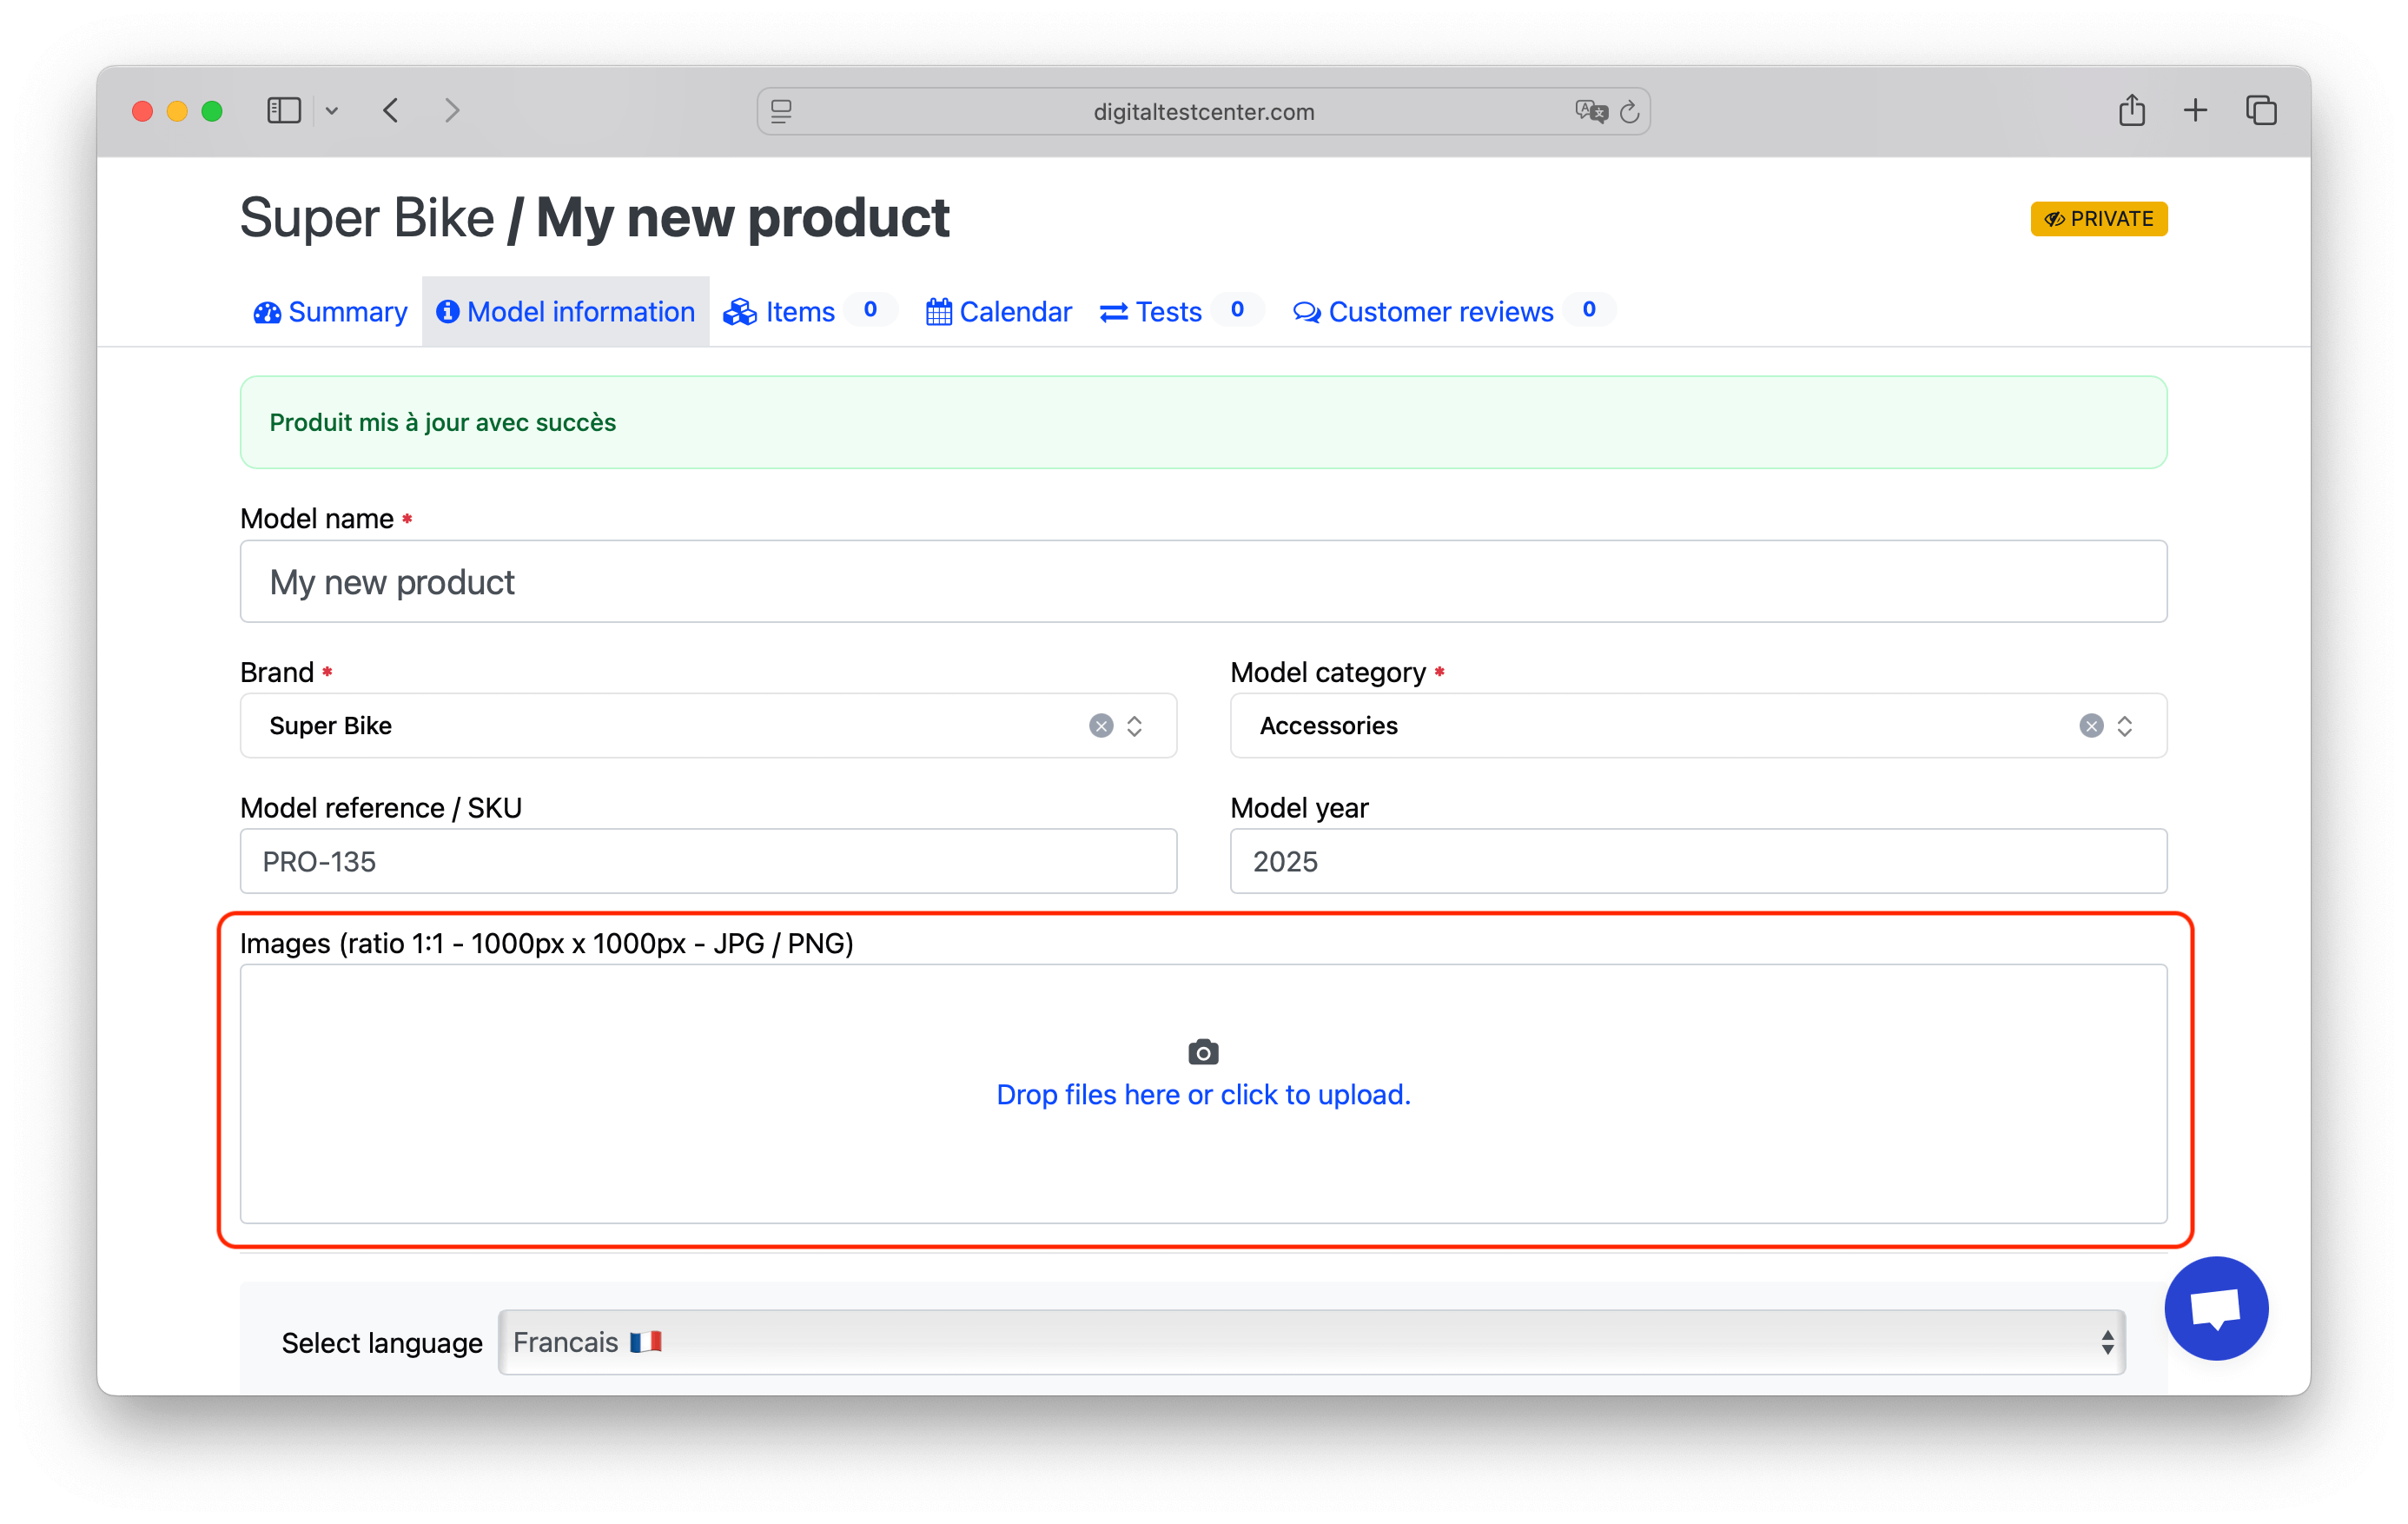
Editing the Model Sheet
A model is the general product reference, equivalent to an e-commerce product sheet.
Size and color variations are managed at the item level, in the Item Management Section.

Fill in the model information
- The model name must correspond to the commercial name of the product. It should allow testers to easily find the model in your catalog and with your resellers.
- The reference and model year are optional fields.
- Be sure to select the correct model category to ensure test security.
Saving the Model
Once the model information is complete, click Save. After saving, you can:
- Modify the model details.
- Add a photo and a description.
Tips for Optimal Size and Quality
The photo size must me less than 1MB and 1000x1000 pixels. To correct the size, you can use the following link: imageresizer or tinypng.
To add a photo, drag your photo to the download area. The photo will appear in the “test summary email” sent to testers for better visibility.